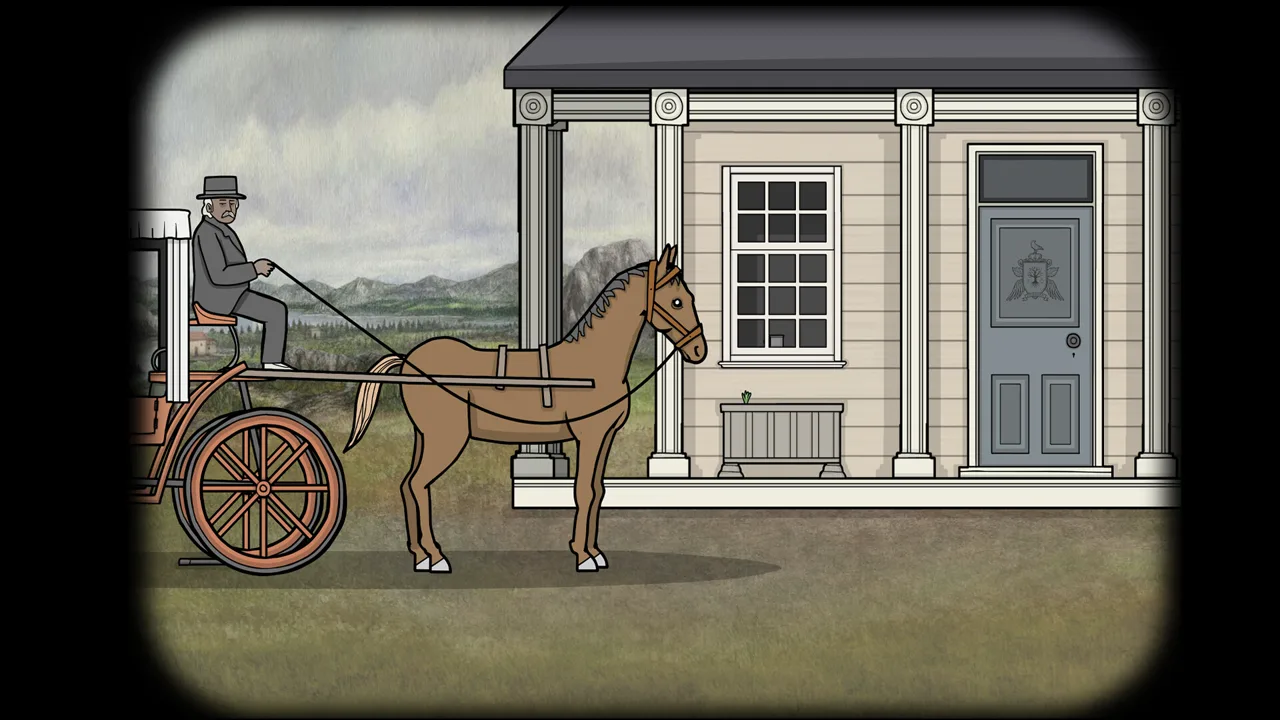
Day 1 is the longest and most puzzle-dense day in Servant of the Lake. It runs Morning, Afternoon, Evening and Night, moving you from the courtyard to Aldous's bedroom, out into the garden, and finally into the parlor for the family reunion. This page walks the whole day in play order; each individual puzzle also has its own page if you only need one answer.
Morning — Courtyard
You arrive by carriage and the driver wants paying before he will hand anything over.
- Collect the two tin cups: one is held by the coachman, the second sits on the window ledge to the left.
- Stack the cups by the number of lines etched on each — read them left to right and stack in that order. Solved, the stack produces the coins the driver is owed.
- Pay the driver.
Hidden achievement — Petting the Horse. Before you feed the horse its carrot, click it repeatedly, including its glasses. One click is not enough; keep going until it reacts. Full details on the tin cup page.
Morning — Hallway
The kitchen chores start here, and two of them feed into each other.
- Gather the porridge ingredients scattered around the hallway and kitchen: wood, oats, milk, a small pot, matches — and a dead mouse.
- Light the stove and cook following the order given on the recipe note.
- At the window, a raven wants a trade. It will hand over a key, but not yet — you need something from the bedroom first.
Hidden achievement — Feeding the Cat. Give the milk to Rustie, the orange cat, before you offer the dead mouse. Order matters; feed the mouse first and the achievement is gone for this run.
The full ingredient list and cook order is on the porridge page.
Morning — Aldous's Bedroom
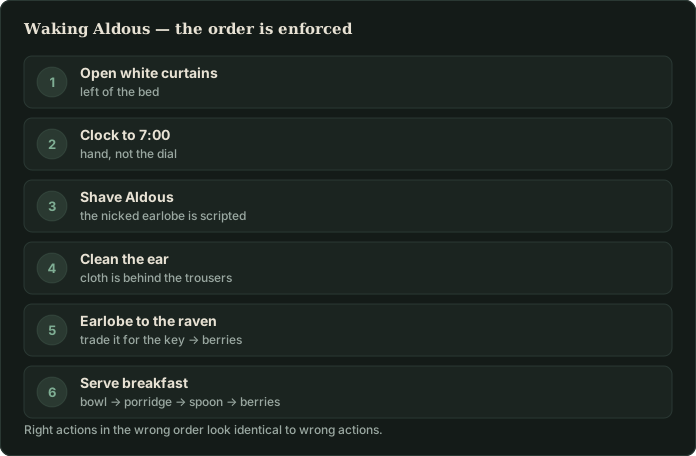
This is the section the demo covers, and it is the strictest sequence in the game.
Shape box. Four geometric shapes, four slots. Match each to its outline. The reward is a razor, which you need immediately.
The wake-up sequence — this exact order:
- Open the white curtains on the left.
- Set the clock hand to 7:00.
- Shave Aldous with the razor. You will nick his earlobe. This is scripted, not a mistake.
- Clean his ear with a cloth — the cloth is behind the trousers on the clothes rack, so move those first.
- Open the window and feed the severed earlobe to the raven. It gives up the key. Use the key on the cabinet to get the berries.
- Serve breakfast in order: bowl → porridge → spoon → berries.
The insect in the porridge. Something is moving in the bowl. Use the berries to plug every hole it can escape through, then kill it once it has nowhere to go. Step-by-step on the porridge page.
Morning exercises. Aldous wants his routine. Copy the poses of the small figurine on top of the wardrobe.
Hidden achievement — Exercising with Mr. Aldous. Do the exercises wrong. Click through them randomly and keep going until Aldous complains that he is stuck. The official clue for this one reads "You have to make him move. How to fail at this task?" — failure is the trigger. See the exercise puzzle page.
Afternoon — Hallway
The house has to be ready before the family arrives.
Chandelier candles. Three candles are hidden across the afternoon's chores. Collect all three, then light them in the order indicated by their shapes. Lighting the chandelier opens the garden door.
Portrait knockdown. Take the feather duster to the portraits until one falls, then reassemble it. Watch closely: every click triggers a small NPC animation, and those animations are the clue for a password box later in the day.
Hidden achievement — Small Repairs. The official clue is "What else can you dust? There is more than three paintings." Do not stop at the obvious three.
Afternoon — Garden
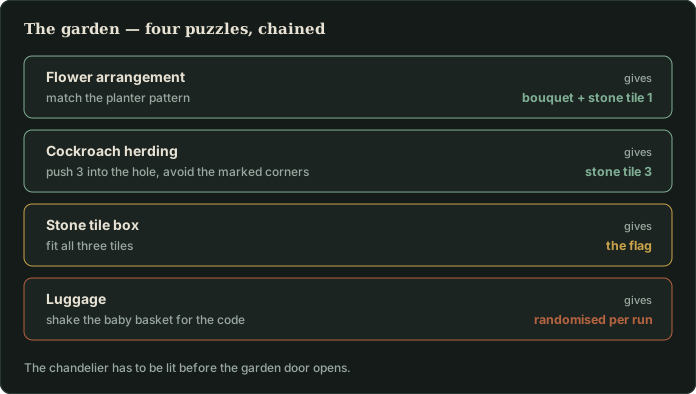
Flower arrangement. Arrange the flowers in the planter to match the pattern shown in-game. You get a bouquet and the first of three stone tiles.
Hidden achievement — Ruining the Bouquet. Let the goat chew the bouquet first, then hand it to Alexandra. The clue: "The goat deserves more attention. Alexandra isn't the only one loving flowers."
Cockroach herding. Use the directional stone tile to push three cockroaches toward the hole, avoiding the marked corner zones. Clearing it gives you the third tile.
Stone tile box. Fit all three tiles into the final configuration. Reward: a flag.
Luggage code. Shake the baby basket and listen — it plays a three-digit code. This code is randomised per playthrough, so no guide can supply it. See the luggage code page for why.
Luggage packing. Fit the items into the suitcase so no empty space is left at the top.
Evening — Hallway: tea service
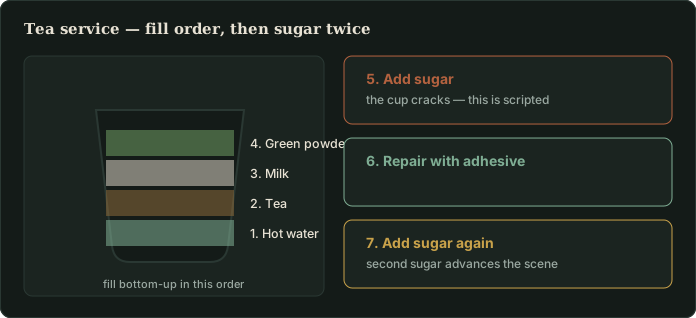
Long chain, easy to break:
- Ask the maid for sugar.
- Give the tea leaves to the cat first.
- Take the cup from the room on the right.
- Take the green powder from the basket.
- Fill in order: hot water → tea → milk → powder.
- When told it is not sweet enough, add sugar. The cup cracks — this is scripted.
- Repair the cup with adhesive, then add sugar a second time to advance.
Hidden achievement — Serving Match Latte. The green powder belongs in Alexandra's tea. The clue nudges you toward the cat and the herbs.
Hidden achievement — Soothing the Baby. Give the champagne to baby James before William gets it.
Evening — Parlor
The reunion proper, and the densest puzzle block in the game.
- Wine cabinet code:
1753— the founding year of the Rusthaven Winery, readable in the room. Details on the wine cabinet page. - Broken bottle. Reassemble the pieces on the floor.
- Nine-button box. Press the buttons in the order the wine cabinet clue gives you. Reward: cigars.
- The cigar goes wrong. William swallows it and his mouth catches fire. Click his teeth to put it out: the left and right teeth steer the water, the centre releases it. Reward: a spoon.
- Painting sequence. Read the clue text, then click the objects in the order it describes. Reward: a fish.
- Flower binary addition (upper level of the red cabinet). You start at 1 and flip four digit switches to hit each target flower count in turn: 2, 3, 7, 9, 13, 22.
- James's lullaby — exact order: James's eyes → moon → swaddling cloth → ring → necklace → lips → the clouds outside the window → Alexandra's eyes.
Hidden achievement — Waking William. Click his hat, ears and tie at random and read which way his eyes point to work out the next one.
Night — Attic
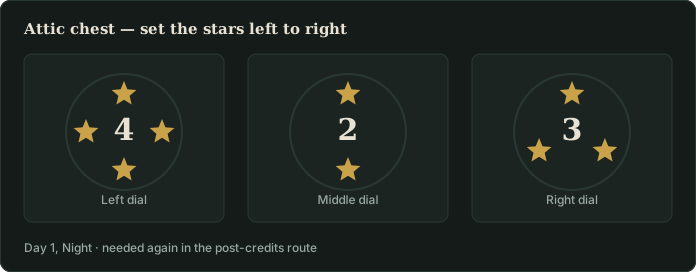
Attic chest stars. Set the stars, left to right, to 4, 2, 3. This same configuration is needed again later for the post-credits secret, so make a note of it.
Hidden achievement — Chasing the Crow. Move in and out of the containers repeatedly until the crow appears at the window, then click it.
Hidden achievement — Checking for Intruders. Go back and check the corridor window where you served the tea.
That closes Day 1. Continue to Day 2, or jump to the full code list if you only came for the numbers.
Sponsored
Sponsored